Adding Postgres and ActiveRecord
Getting started - adding dependencies to your project
Guides, tutorials and labs to accompany CMU's Programming for Online Prototypes (49-714).
Everything you need to know about building microservices for the web with Ruby and Sinatra.
In this step you will deploy the app to Heroku.
Now that we have our project set up locally on our machine and everythings running nicely. We need to set up an “app” on Heroku, that can receive our source code (from Git) and attach our Sinatra application to a live public URL!
Open a new command line window, navigate to your project (cd path/to/project), and type the below
heroku create
A few seconds later you’ll see something like this:
Creating polar-inlet-4930... done, stack is cedar-14
http://polar-inlet-4930.herokuapp.com/ | https://git.heroku.com/polar-inlet-4930.git
Git remote heroku added
When you create an app, a git remote (called heroku) is also created and associated with your local git repository. Heroku generates a random name (in this case polar-inlet-4930) for your app, or you can pass a parameter to specify your own app name.
Once it’s up and running you can also visit your heroku dashboard, you’ll see a list of apps, and if you select one, and go to the Settings tab you’ll see an option to rename it too.
OK, now we need to get the code from our local machine to the heroku web app and run it.
To do this, you’ll need to
Open GitHub Desktop and commit any new changes (type a name for the commit, and press ‘Commit to Master’, then Sync on the top right )
Once it’s synced, return to the Terminal/Command Prompt window and type the following to deploy your code:
git push heroku master
A few seconds later you’ll see a lot of text appear… It should look something like this
Fetching repository, done.
Counting objects: 10, done.
Delta compression using up to 4 threads.
Compressing objects: 100% (6/6), done.
Writing objects: 100% (6/6), 876 bytes | 0 bytes/s, done.
Total 6 (delta 4), reused 0 (delta 0)
Congrats, your app is now deployed. Now visit the app at the URL generated by its app name. As a handy shortcut, you can open the website as follows:
heroku open
Tip: if that didn’t work here’s a few things to try
bundle install - check your gems are up to dateYou’ve deployed your code to Heroku, and specified the process types in a Procfile. You can now instruct Heroku to execute a process type. Heroku does this by running the associated command in a dyno - a lightweight container which is the basic unit of composition on Heroku.
As mentioned above, if everythings running we can now visit the app in our browser with heroku open.
heroku open
You can now visit your application at a public URL. Each time you make a change you’ll need to commit those changes to git and deploy to heroku using the command
git push heroku master
ProTip: If you don’t like the command line interface, you can do almost everything here through Heroku’s awesome online dashboard too. But once you get the hang of the CLI, it’s faster and better.
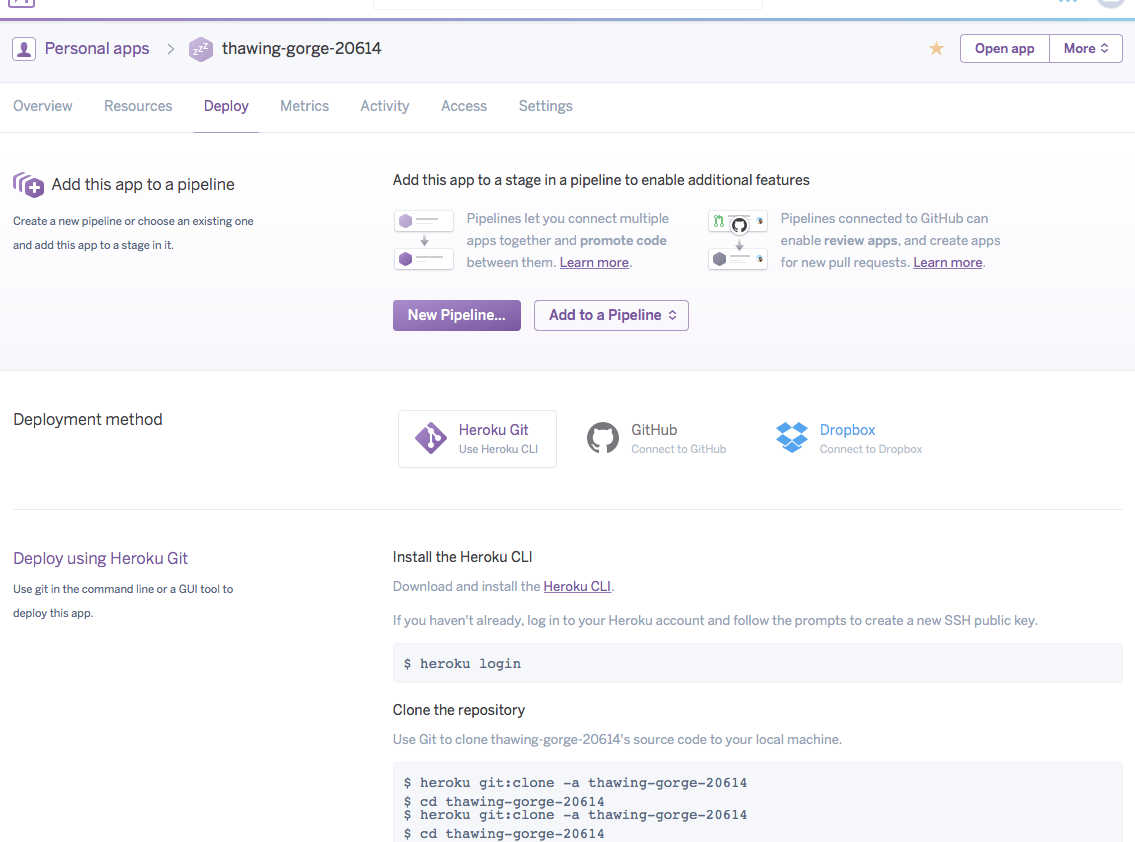
If you’d like to cut out one step from this workflow, you can avoid having to type git push heroku master. Instead you can link your Github repository to your Heroku application and it will detect any new commits. Then it will automatically deploy your application when you make new commits.
To do this, visit your Heroku Dashboard, open up your app and go to the Deploy tab. You’ll see an option half way down the page. Click it and follow the prompts.
You can read more about automatic deploys in this article: https://devcenter.heroku.com/articles/github-integration#automatic-deploys
A cautionary note: If you do automatically deploy, and you have problems with your deployment you won’t get a notification. If you deploy from the command line/Terminal window, you can see when it’s gone wrong. If you automatically deploy, you’ll need to check the logs to find out (see above.)