Adding Postgres and ActiveRecord
Getting started - adding dependencies to your project
Guides, tutorials and labs to accompany CMU's Programming for Online Prototypes (49-714).
Everything you need to know about building microservices for the web with Ruby and Sinatra.
This guide assumes you have a working application that is deployed to Heroku. If you don’t have that, follow the other guides to get to this point.
Visit Twilio.com and set up a trial account
Get your Developer information and keep it safe: You’ll need both the Auth and Secret info.
You can find this info on the home screen or you can navigate to your settings and take a copy of the API credential.: https://www.twilio.com/console/account/settings
You’ll also need a phone number and they can be set up at: https://www.twilio.com/console/phone-numbers/incoming
Once you’ve created your twilio account you’ll need to map the URL of your application and endpoint you’ll use to Twilio service… so they know where to find your app.
You’ll need to tell your Twilio account how to talk to your Heroku deployed sinatra application. We’ll do this by connecting it to an endpoint on our service named ` GET ‘/sms/incoming’`. If you haven’t created this endpoint, create it now or remember to create it later.
Navigate to your numbers, and click into the number you want to connect to your web application.
Scroll to the end of the page, to the settings labeled Messaging
You should see an option called A message comes in
Edit the text box to point to your Heroku URL and add a default endpoint where you will have a Sinatra route to pick up the request e.g. something like https://infinite-castle-99999.herokuapp.com/sms/incoming
Make sure to change the dropdown option from POST to GET
Save your changes.
Then return to your project folder.
We’ll use an awesome gem for this dotenv
But it is not always practical to set environment variables on development machines or continuous integration servers where multiple projects are run. dotenv loads variables from a .env file into ENV when the environment is bootstrapped.
In your Gemfile, add
gem 'dotenv', :groups => [:development, :test]
in your app.rb
configure :development do
  require 'dotenv'
  Dotenv.load
end
Create a new file called .env in your project folder and edit it to add your Twilio details (replace the default example below)
TWILIO_ACCOUNT_SID = XXXXXXXX
TWILIO_AUTH_TOKEN = XXXXXXXX
TWILIO_FROM = "+1987654321"
Theres two ways to do this:
In the command line (make sure you’ve cd‘ed into your project) use the following command:
heroku config:set VARIABLE_NAME=VARIABLE_VALUE
You can replace VARIABLE_NAME=VARIABLE_VALUE with a single line from your .env file. Note that you have to type this command for each line in your .env so if you have 5 lines, you’ll repeat this five times.
When you’re finished, type
heroku config
This will give you a list of the environment variables that have been set on heroku. Check to make sure they’re all set up correctly and match what’s in your .env
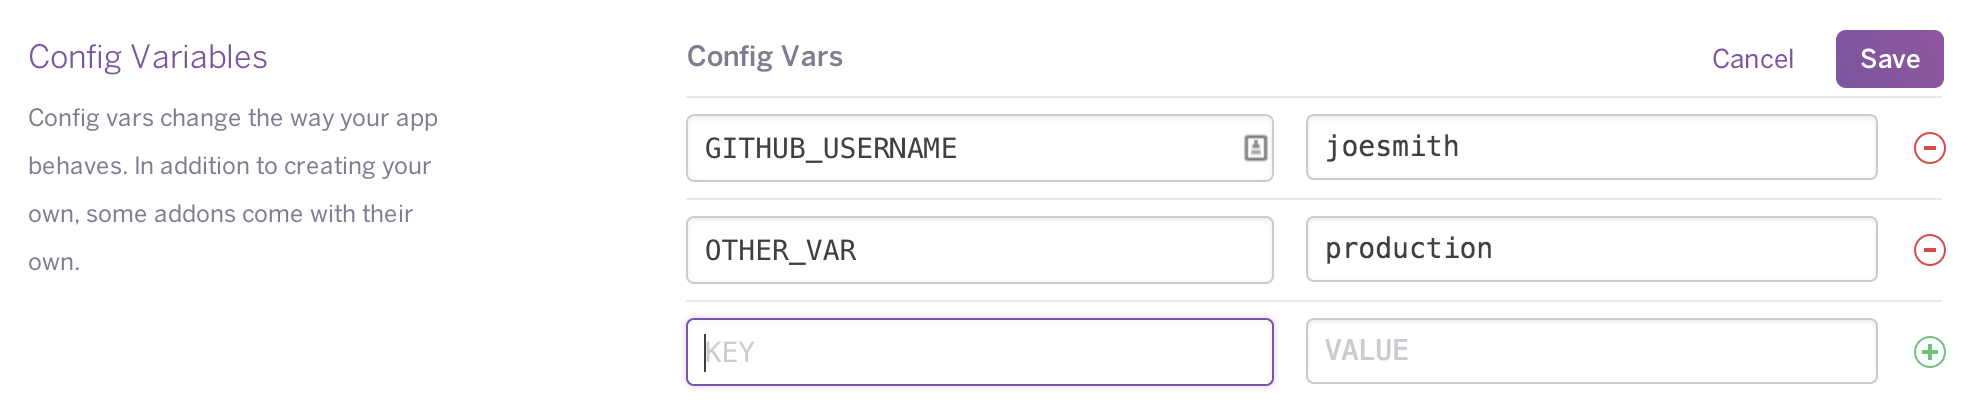
Using Heroku.com
If you’d prefer you can also do this through Heroku.com, sign into your account. Select your application, choose the Settings tab and click the button to Reveal config variables
We need to add one more gem - the Twilio Gem - to our project
In your Gemfile, add
gem 'twilio-ruby', ">5.0.0"
in your app.rb
require 'twilio-ruby'
Then make sure you update your gems. In the command line (and make sure you’re in the project folder, if not `cd in ), type the following:
bundle install
Twilio requires sessions are enabled to work well. Make sure you have or add the following code to your application:
enable :sessions
bundle install - check your gems are up to date git push heroku master